What is Onboarding?
In relation to technology apps like Boomerang, onboarding is a process used to make the setup of an application as painless and user intuitive as possible. Once you complete the onboarding of an app, you should be on your way to using and enjoying that app.
We studied many different types of apps for our onboarding steps. I even attended Samuel Hick’s session on User Onboarding at a Hootsuite sponsored event. Samuel is a leader in breaking down and improving many popular apps’ onboarding process. We’ve applied some of this learning to our onboarding with Boomerang to truly provide the best experience for our users which will primarily consist of very busy parents! In our research, we also reviewed many apps in the parental control space with some providing a good experience but most of them expected their user to be quite technically savvy. In summary, many provided nice interfaces, neat features and useful reporting on your child’s activity. One area that presented an opportunity for us was the onboarding of these apps (and some other things we have yet to share!)
I want to share a little bit of what went into our user onboarding steps which will serve as a quick overview for those interested in Boomerang and also for those interested in what went into creating this process for their own product.
- We wanted to highlight the strengths and benefits of using our app. We originally had users simply log into My Account (which is our web dashboard for advanced configuration) with no real direction on what to do next.
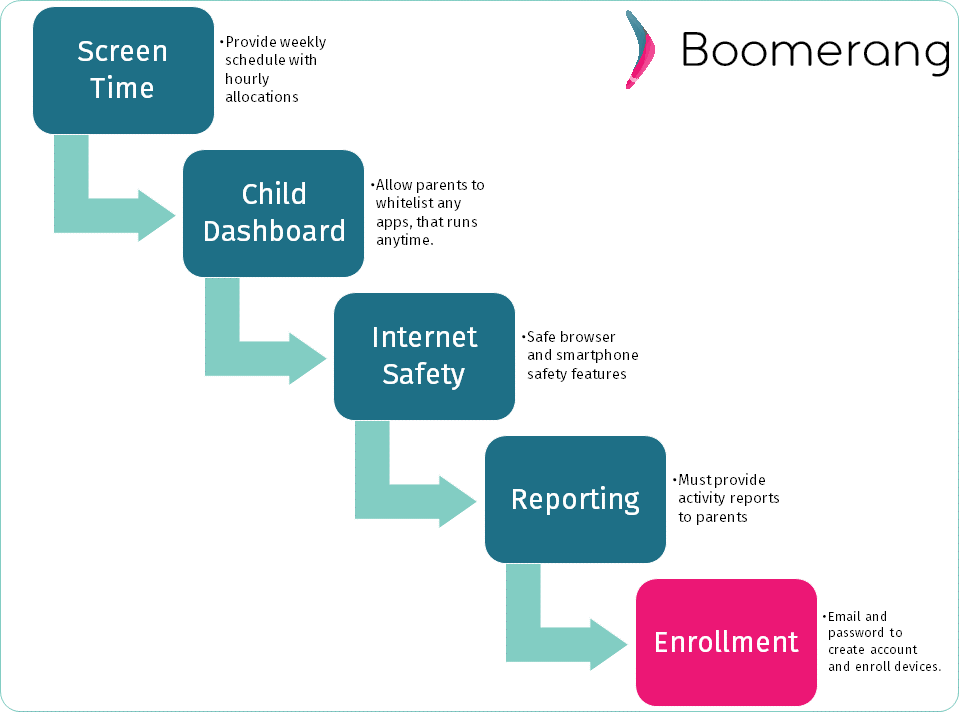
- We then broke down the important steps to 4 individual steps for the onboarding – that was not easy, trust me! Boomerang comes with many rich and advanced features and to focus on just 4 areas was a challenge.
- We felt educating the parent as they setup their child’s device settings was important so you’ll notice that every step includes useful helper text.
- We had to make these settings easily apply to the child’s device (more on that later). We considered various options but stuck to a common email/password combination and a very cool QR Code approach.
- Lastly, we continue to iterate this process so we are 100% open to receiving your thoughts on what is really “version 1.0” of our onboarding experience. Feel free to email us your feedback.
The following screenshots are actual screenshots of our sign up process.
Step 1 – Configure Screen Time
An important step to allow you to have the device provide feedback on time left and their time on the device is up. This is probably the biggest challenge we solve for parents where these devices do become addicting. As mentioned in my previous blog, we as parents need to care about screen time. We want to empower the child with their device and at the same time respect it when it tells them their time is up for today. There’s a lot of research on this subject and screen time for all of us is well beyond the recommendations by various Pediatrics Societies.
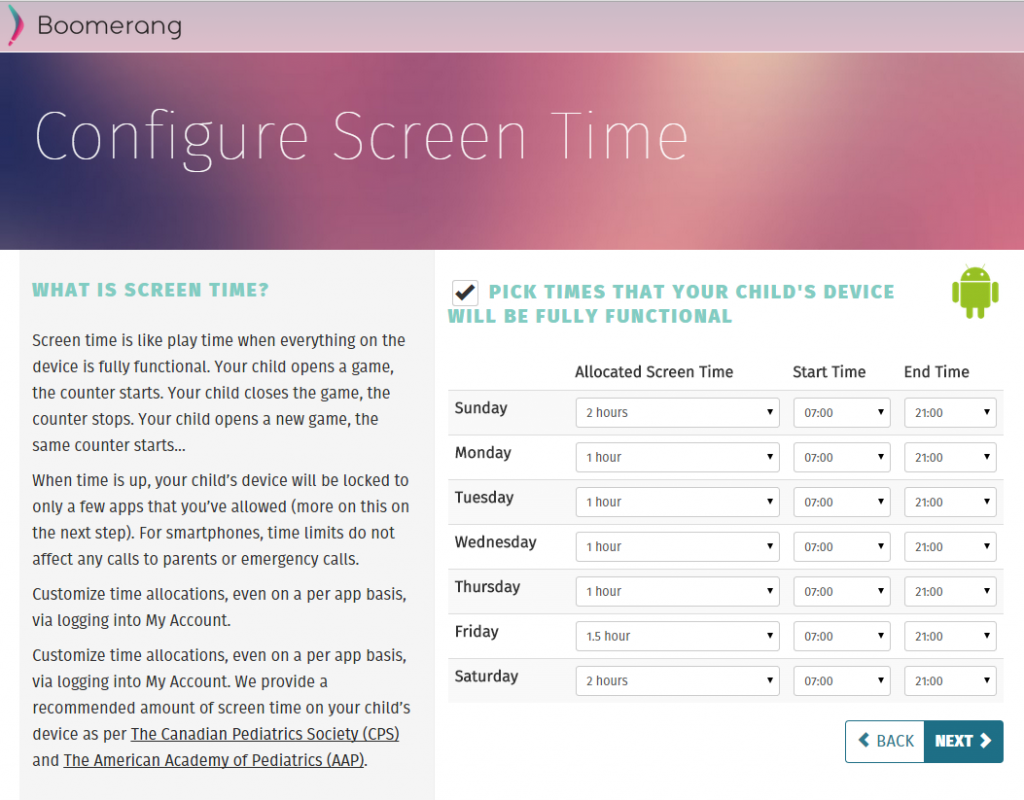
Pick a time and schedule where your child’s device will be fully functional.
Step 2 – My Child’s Dashboard
The Child Dashboard, which is the default view for your child within our Boomerang app, is one of the most powerful features we have where you as a parent are in full control of what apps are OK to use anytime. This function works in unison with our screen time functionality so when time is up, any apps that are not on your Child’s Dashboard list, will not open and forward your child back to the Boomerang app where they are allowed to run the apps you selected. We start you off with some basic ones but plan to grow this into a recommendation engine based on your child’s age. You can add any apps that are already installed on your child’s device via My Account, thus limiting time on games but allowing educational content to be viewed anytime. We’ll have some upcoming blog posts on apps we feel are perfect for inclusion on your Child’s Dashboard.
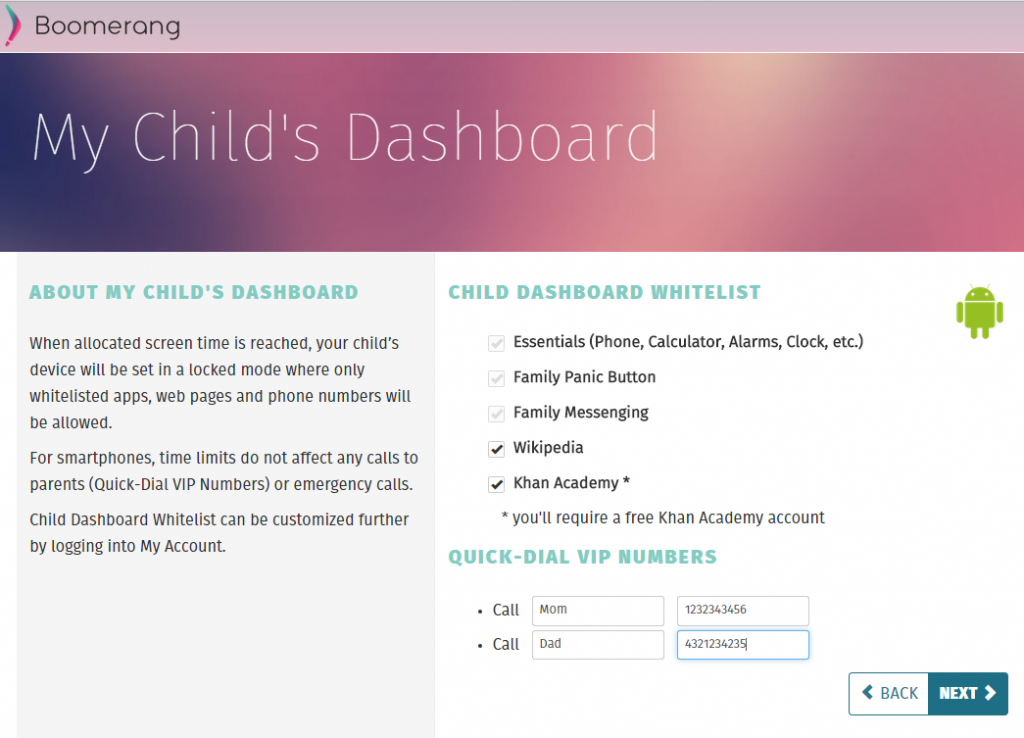
Child Dashboard, an area where parents can easily allow apps of their choice to run anytime.
Step 3 – Child Safety
On this tab, we introduce you to SPIN our own web browser that when used with Boomerang leverages the built-in content filtering categories. We also have a couple of very powerful smartphone features. Primarily we can limit what numbers can call and text based on who’s in your child’s local address book. All other numbers will simply be blocked! Since children do get their hands on smartphones at an earlier age now, we also offer a keyword dictionary that will actually fully block any inappropriate language from being sent or received – you can also add your own custom words to your dictionary. As a parent, if you’re interested in knowing what these blocked texts were, we do allow you to enable a text message collection service that will provide a log of these messages via My Account. This does toe a fine line of privacy so by default this keyword detection is not enabled.
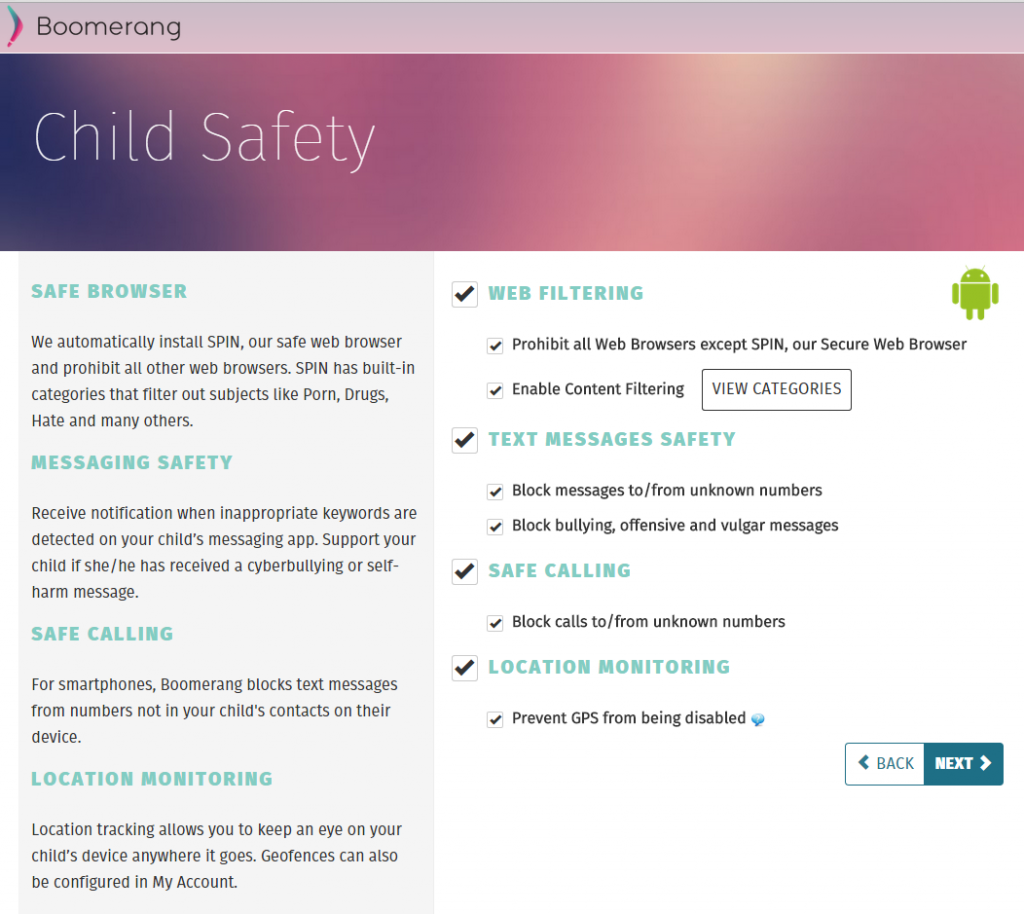
Close to all of our hearts as parents – powerful safety features for tablets and smartphones.
Step 4 – Reporting and Settings
If you entered a phone number for your Child’s Dashboard, the first number entered will be automatically used for notifications via SMS (we also notify the parent via our app). We will email you a daily digest of your child’s device activity and on this page the defaults are highly recommended. For example, we’ll make sure your child cannot access the Play Store and as a result limit any chances of accidental purchases (including in-app ones!). We also prohibit changing YouTube settings which will also have a dedicated overview on soon!
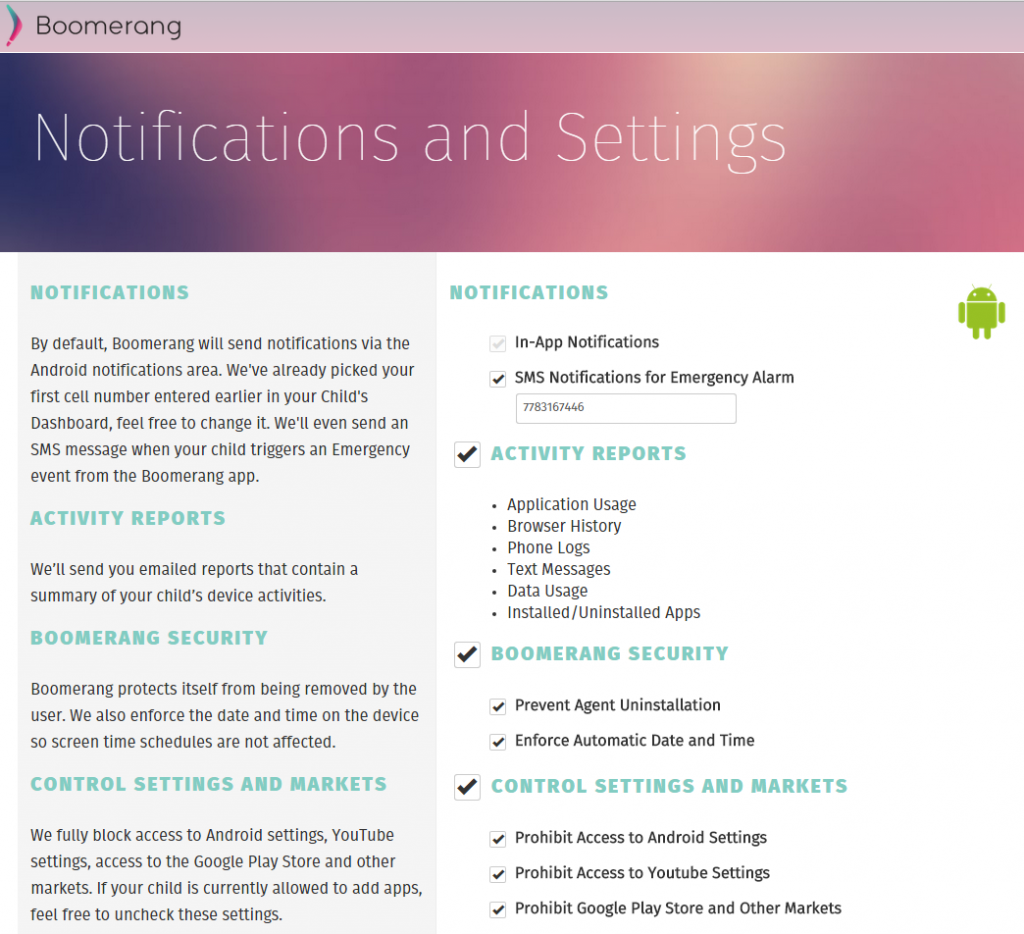
Get notified and control some of the device’s more advanced features.
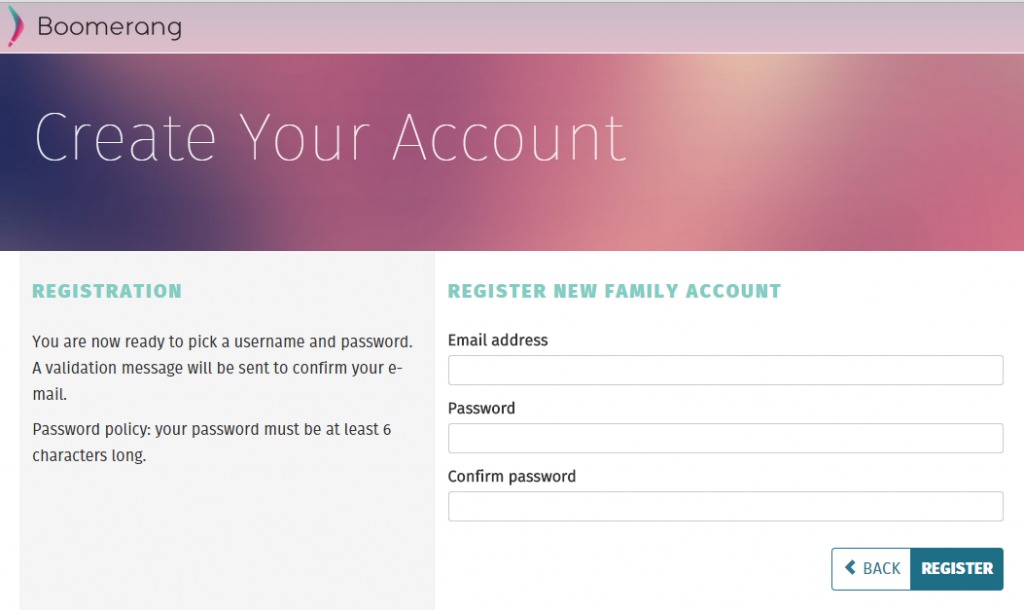
Step 5 – Create Your Account
In terms of configuration you are now set and ready to install Boomerang on your child’s device. Our enrollment can be completed by logging with your username and password in our Boomerang app but we’ve also provided a QR Code enrollment option! This QR Code contains your credentials and is viewable in your welcome email and in My Account.
At this point you’re ready to apply your settings to your child’s device. Use these credentials to log into our app on all your family devices!
Comments are closed.